Airtable
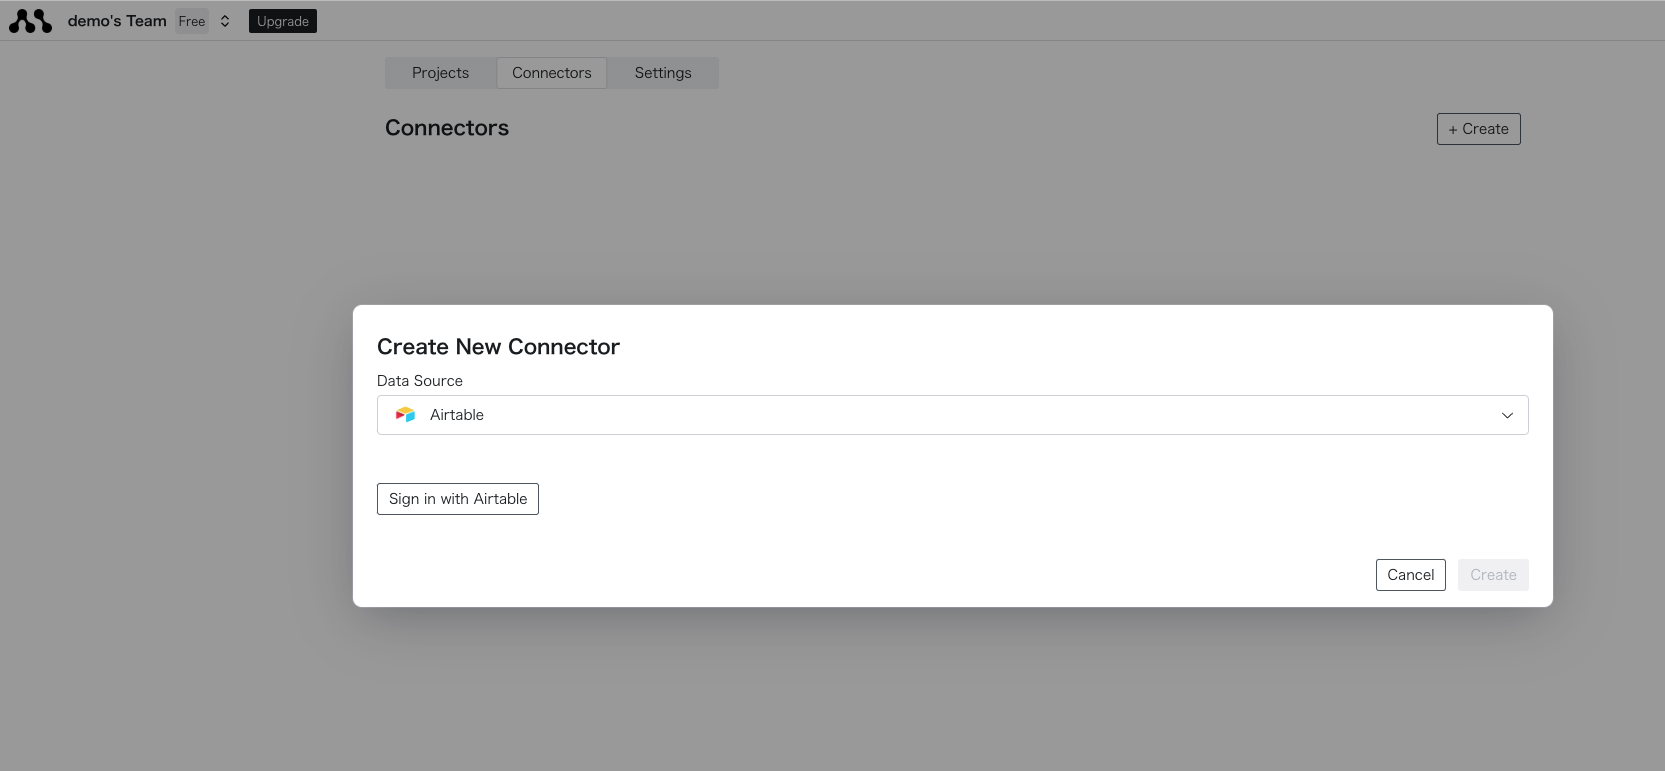
Connecting to Airtable
For an overview of the connector, please refer to the following link:
Create a Connector
Select the “Connectors” tab on the top page and press the “Create” button.
Enter Airtable Credentials
Select Airtable and press the sign-in button.
After entering the information, press the Create button to complete the creation. If there are any errors, please check the connection details again.
Obtain access_token from the created connector
Once created successfully, you can obtain the connector name from the list.
Use the dedicated function to enter the connector name in the Python code and obtain the access_token.
~/.morph/connections.yml
. For other methods, please create them in the dashboard.Edit connections.yml
If the file does not exist in ~/.morph/connections.yml
, create it beforehand and then edit it.
Use the connector in the code to retrieve data
Use the dedicated function to enter the connector name in the Python code and obtain the access_token.
The refresh of the access_token is a dashboard feature, so the one described will always be used in the local environment.
When actually specifying the connector and executing the file, the priority is as follows:
Also, note that only connectors created in the dashboard can be used in the environment where morph deploy
is performed.
- Connectors described in
~/.morph/connections.yml
on the local machine - Connectors registered in the cloud